
 by
by If you are somewhat familiar with mobile development, you have probably heard about Flutter, an open-source framework developed and maintained by Google for building natively compiled, multi-platform applications from a single codebase. This article’s objective is not to make you an expert, but to touch on some of the basic concepts of this framework.
Flutter
Flutter is a framework for building apps for Android, iOS, Desktop and Web with a single codebase. In this excellent video, Fireship introduces the framework in his series “100 seconds of” and gives a little overview.

Read more about flutter in the documentation.
Dart
Dart is a multi-paradigm language developed by Google in 2011 originally intended to replace JavaScript in web development, but it was not successful in this mission. It started to shine when was adopted by the flutter framework.

Read more about dart in the documentation.
Prerequisites
There are some no-brainers on this topic, but it is always good to re-enforce it.
Algorithm
Something that you need to know before learning flutter is basic programming knowledge. You don’t need to be Alan Turing himself, but if you wanna build more complex apps, knowing how data types work, how the selection and the loop structures work, and knowing how to iterate a list of items will be essential. But nothing that a little time studying doesn’t help you to get the basics.
Object-oriented programming
Same thing: you don’t need to know everything about this theme, but objects are a common thing when you are working with flutter, so you need to know how they work and how to interact with them.
Environment Setup
The flutter documentation is very descriptive and has guides to the flutter setup in Windows, Linux, Mac, and Chrome OS. We recommend you to follow their documentation for your OS.
Development environment and recommended tools
If you find Flutter code too complex, or too fuzzy, then this topic is essential to you. One of the strong points in flutter is the tooling. Most of the tools listed below are essential, but also simple to use and very useful. If you put a little effort into learning them, your life is gonna be a lot easier.
For programming with Flutter, it is recommended to use a text editor with plugins for an even better experience. For this article, we recommend using Visual Studio Code.
- Visual Studio Code
- To install: Visual Studio Code – Code Editing
- Extensions:
- Dart (Must have)
- Flutter (Must have)
- Better Comments (Recommended)
- Awesome Flutter Snippets (Recommended)
- Bracket Pair Colorizer 2 (Recommended)
- Error Lens (Recommended)
If you want to use Android Studio as your editor, we recommend this video to set it up with the right plugins.
Another important thing during development is to use Git for tracking changes in any set of files, maintaining or rolling back versions of code, and for multiple programmers collaborate on the software development.
- Git
- To install: Git – Downloads (git-scm.com)
- The basics: Git Tutorial for Beginners: Learn Git in 1 Hour
You can write complex apps using only the essential tools in this list, and I assure you that once you learn them you will use them everywhere in your flutter projects. You can see the flutter tooling in action in this video.
If the tolling subject was a little confusing to you, we suggest you come back before the widget section of this article.
Basic framework interactions
This section describes how to use the most important Flutter command-line tools and how to interact with a running app. Some of these commands are available on a GUI on your VSCode or Android studio, but by now we will focus on the command prompt version.
To create your project, first, enter your desired directory by command line and use the command:
flutter create your_project_name
Then, access your new project’s folder using the command:
cd your_project_name
You can use the command flutter analyze to check for problems in your code. To check if an Android device is connected, it could be an emulator or a configured device, use the command flutter devices. See how to configure a device for your OS in the install section of the flutter documentation.
External packages are very important in the development process. To add an external package, you can use the command flutter pub add name_of_package. To find all the packages, you need to search on the Dart packages (pub.dev), the official package manager of Flutter. It is very recommended to check on pub.dev if the package is updated and compatible with your flutter version.
After using the command, the package will be added inside the file pubspec.yaml, inside of ‘dependencies’, like this:
dependencies:
    flutter:
         sdk: flutter
    package_name: ^1.1.0’
You can add manually, just writing the package name and their version inside the dependencies, like above.
After adding, removing, or updating the version of a package, you will need to run the command flutter pub get, to update all the dependencies. The command flutter pub outdated shows outdated packages, indicating versions that are not the latest available. And the command flutter pub upgrade gets the latest versions of all dependencies.
The command flutter clean deletes your builds and your downloaded packages. It is recommended to always clean your project before building a test or a release version.
To run the project, use the command flutter run. While the application is running, it is possible to use Flutter’s hot-reload and hot-restart feature.
Enter r (lowercase) in the terminal to hot-reload the app. The hot reload feature is going to update the app.
Enter ‘R’ (uppercase) in the terminal to hot-restart the app. The hot restart feature is going to update and reset the app.
But remember, only Flutter apps in debug mode can be hot reloaded or hot restarted. That’s because the debug mode uses the just-in-time compilation, but this subject deserves its post.
The command flutter build will show the build options for your app.

If you want to generate an apk for your app, use the command flutter build apk, if you want an app bundle, use flutter build appbundle. After the build, the console will show you the path of your file.
![]()
For more information about commands and the flutter command-line tool, check the documentation.
Coding with Flutter
When you create a new flutter application, it comes with a default template, which is a simple counter app.
All the code you will write to build a basic flutter app will be in the lib folder. You can see the template project’s code in the “main.dart” file inside the lib folder. When you compile the project, the project will search for the main method inside this file. Try this, erase everything inside the “main” file and paste the code below:
void main() {
 debugPrint("I am alive!!!");
}
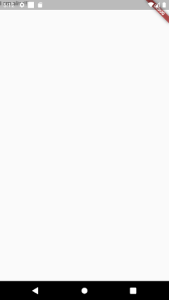
You can already compile or run the code above in an app, but it is a sad app that says “I am alive!!!” on the console but doesn’t render anything on the screen. Let’s change that.
Everything in flutter is made of widgets (more of this later), even the app itself is nothing more than a giant widget. So, if we render something with flutter, it’s gonna be a widget.
Let’s create our main widget that holds the app itself, our MyApp widget. This was created with the template when you start the project, but let’s do it on our own, step-by-step.
To create the MyApp widget you need to extend the StatelessWidget class to have access to the build method, the method responsible for drawing the component. The build method needs to return a widget. It is the first widget of all our widget’s tree so we need to return a MaterialApp widget.
The MaterialApp is a widget that wrap widgets required for material design applications. Material design is a design system created by Google.
In practice, the main widget of our widget tree will be the MaterialApp. This widget is going to wrap up our app. This is from the material package, so you will have to import it. To do it, just put this code at the top of the document:
import 'package:flutter/material.dart';
To build your MyApp class put this code below the main method:
class MyApp extends StatelessWidget {
 const MyApp({Key? key}) : super(key: key);

 @override
 Widget build(BuildContext context) {
   return const MaterialApp(
     home: Text("I am alive!!!"),
   );
 }
}
So, in this code we declare the MyApp class widget, the widget that will hold our entire app, which extends the StatelessWidget to use the method build to draw our widget. Inside this method, we return an instance of MaterialApp where we need to wrap the material design widgets and, inside of it, we just instantiate the Text widget from the material package that will show some text.
If you are somehow familiar with object-oriented programming, you know that we just declared a class that we need to instantiate.
So, replace our main method with:
void main() {
 runApp(const MyApp());
}
or
void main() => runApp(const MyApp());
Notice that in dart we don’t need to use the “new” word to instantiate a new object from a class, like in java or c#.
The runApp function is responsible for, as the documentation says, inflate the given widget and attach it to the screen. So, from this attached widget, it will grow the widget tree of our app.
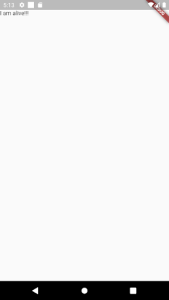
And, after all this hard work, our code will look like…

Well… it is alive, but a Frankenstein kind of alive. How about we turn this into something a little bit more charming?
So, first of all, why is it in red and underlined? Why does the console show us an exception? Well, that’s because the Text component was not supposed to be thrown on an empty screen. So, the app does not know what to do with it.
That exception says that the framework does not know the directionality of the text, it needs a directionality widget, so it knows the direction it should draw the text. Not all languages have a left-to-right orientation, like Arabic.
We can fix it in many ways, we can write the Text widget like this and fix it with a parameter:
Text("I am alive", textDirection: TextDirection.ltr);
Or maybe we can wrap the Text in a directionality widget like this:
   Directionality(
     textDirection: TextDirection.rtl,
     child: Text("I am alive"),
   );
But the real truth is that we shouldn’t draw anything on a screen without the Scaffold widget, which is like the backbone of a screen, so, let’s wrap our text in a scaffold:
class MyApp extends StatelessWidget {
 const MyApp({Key? key}) : super(key: key);

 @override
 Widget build(BuildContext context) {
   return const MaterialApp(
     home: Scaffold(
       body: Text("I am alive!!!"),
     ),
   );
 }
}
Then we hit the hot-reload so we can refresh the app.
Well, it is less scary now, and that exception has now disappeared, because now the text can take the default ambient directionality information, without needing to declare it implicitly.
But you probably notice that it is not quite right yet. The text is kind of hidden in the status bar (the bar that shows the notifications and phone status, like battery information). To fix it, we can wrap our text in a SafeArea widget. This widget checks the dimensions of the screen and pads the content inside of it.
class MyApp extends StatelessWidget {
 const MyApp({Key? key}) : super(key: key);

 @override
 Widget build(BuildContext context) {
   return const MaterialApp(
     home: Scaffold(
       body: SafeArea(
         child: Text("I am alive!!!"),
       ),
     ),
   );
 }
}
After we hit the hot-reload the screen is going to look like this:
By now, I think we understand a little better how widgets work and how they interact with each other, so we can do a little jump in our code.
class MyApp extends StatelessWidget {
 const MyApp({Key? key}) : super(key: key);

 @override
 Widget build(BuildContext context) {
   return MaterialApp(
     home: Scaffold(
       appBar: AppBar(
         title: const Text("Application title"),
       ),
       body: const SafeArea(
         child: Center(
           child: Text(
             "I am alive!!!",
             style: TextStyle(
               fontSize: 40,
               fontWeight: FontWeight.bold,
             ),
           ),
         ),
       ),
     ),
   );
 }
}
Ok, let me explain what we did here:
– We add an AppBar widget in the appBar parameter of our scaffold, then we add a Text widget in the title component of our AppBar.
– We wrap our text in a Center widget so we centralize our text in the center of our available space on the screen.
– Then we put some style in our text with the widget TextStyle that fits in the style parameter in the Text widget.
Then, it is going to look like this:

You probably see that, even though our app is just a static screen, as we add more complexity to the screen, the code becomes more and more like a nested tree that is hard to follow. You need to be careful about this when working with Flutter, but we can always abstract parts of it. So let’s refactor this a little bit.
How about separating our home screen in a custom widget? So, create a new folder inside the lib directory named “pages”, inside of it, create a new file named “home_page.dart”.
Inside our new file, import the material library from the material package, create a new Stateless widget named HomePage, and paste the code from our page in the build method of our new class. The code is going to look like this:
import 'package:flutter/material.dart';

class HomePage extends StatelessWidget {
 const HomePage({Key? key}) : super(key: key);

 @override
 Widget build(BuildContext context) {
   return Scaffold(
     appBar: AppBar(
       title: const Text("Application title"),
     ),
     body: const SafeArea(
       child: Center(
         child: Text(
           "I am alive!!!",
           style: TextStyle(
             fontSize: 40,
             fontWeight: FontWeight.bold,
           ),
         ),
       ),
     ),
   );
 }
}
Replace our page code inside the main.dart with a instance of our new page widget:
class MyApp extends StatelessWidget {
 const MyApp({Key? key}) : super(key: key);

 @override
 Widget build(BuildContext context) {
   return const MaterialApp(
     home: HomePage(),
   );
 }
}
And make the necessary imports in our main.dart file:
import 'package:YOUR_PROJECT_NAME/pages/home_page.dart';
Ok, so let’s review what we did and what concepts we saw with this:
- The framework will start its reading by the main.dart file inside the lib folder.
- The framework will read the main function inside of this file, so is in this method that we need to instantiate our app.
- Everything in flutter is a widget, the app itself is a big widget with smaller widgets inside.
- Some widgets need some appropriate context and environment to work as expected.
- The structure and the style of the page are dictated by the widgets and their parameters.
- Abstracting your components into smaller components is essential if you want to have readable code.
Widgets
So, by now you have read the word widget a lot, but, what is a widget?
Following the definition of the documentation:
“Widgets are the central class hierarchy in the Flutter framework. A widget is an immutable description of part of a user interface. Widgets can be inflated into elements, which manage the underlying render tree.”
Immutable? So that means that we can’t update our UI? No, that means that when the framework is told to update the UI it replaces the rendered object that has changed, reusing what does not change. But this is not something that you need to worry about right now. But if you want to understand more about this we highly recommend this video from RetroPortal Studio. Basically, every UI element in Flutter is a widget.
The Flutter framework has a bunch of widgets at your disposal. If you want to build a component, Flutter probably already has a widget for it (take a look at the Widget of the week playlist made by Google). But if you want to leverage the reusability that flutter provides you can and should build your custom widgets too.
There are two types of widgets:
– Stateless, they don’t have state control by themself as they are static, fitted for widgets that don’t need to be dynamic.
– State-ful, sensitive to data changes and update their state if requested.
Example of stateless widget:
class MyStatelessWidget extends StatelessWidget {
 const MyStatelessWidget({Key? key}) : super(key: key);

 @override
 Widget build(BuildContext context) {
   return const Text("I can't update my state through my life cycle.");
 }
}
Example of a Statef-ful widget:
class MyStatefulWidget extends StatefulWidget {
 const MyStatefulWidget({Key? key}) : super(key: key);

 @override
 State<MyStatefulWidget> createState() => _MyStatefulWidgetState();
}

class _MyStatefulWidgetState extends State<MyStatefulWidget> {
 int number = 0;

 void updateNumber() {
   setState(() {
     number++;
   });
 }

 @override
 Widget build(BuildContext context) {
   return TextButton(
       onPressed: updateNumber,
       child: Text(
         '''I can update my state through my life cycle,
         look at this: $number''',
       ));
 }
}
To force a stateful widget to redraw itself you just need to call the setState function, then the widget state control will redraw itself with what changes.
Yes, this code is a bit scary, but you are not supposed to write all of it (like the declaration of the class, the extends, and the overrides). This is a job for your powerful flutter tools. To read more about it, see the section “Development environment and recommended tools” in this article.
So, if I can make everything that the stateless do with a stateful, why use the stateless anyway? The answer if that stateful is more expensive and complex to manage, so if your custom widget will not change its state, make it stateless so your app doesn’t get too expensive.
Conclusion
In this article, we covered some basics topics of how the Flutter framework helps to create Dart applications, including the Flutter setup, toolings for development, the interactions with the framework, what are widgets, the difference between stateless and stateful and a little introduction of how to code using this framework.
We just touch the surface. There are a lot of other basic topics to cover in the next articles, such as state management, API consumption, error handling, database integration, navigation, null safety, etc.
Flutter is a powerful tool with an excellent development experience. You definitely should try it.
If you don’t want to wait for the next articles to get deeper on coding with Flutter, feel free to check the links in the references below.
References
- Flutter – Documentation
- Dart – Documentation
- Flutter in 100 seconds – Fireship
- Dart in 100 seconds – Fireship
- Flutter Widgets Explained | Understand How Flutter Works! – RetroPortal
More links
- React Native vs Flutter – I built the same chat app with both – Fireship
- Flutter for the JS Developer – Fireship
- Flutter Basic Training – 12 Minute Bootcamp – Fireship
- Widget of the Week – Playlist – Flutter
- Flutter Course – Full Tutorial for Beginners – Free code camp
We want to work with you. Check out our Services page!


