
Neovim Tips and How to Start
Table of Contents
At the beginning of this year, I made my code editor transition from VSCode to Neovim, but there were some features, plugins, and tips I wanted to know before when I started. In Neovim, you can change it to be whatever you want, and in this article, I will share some tips that will maybe make your transition easier.
Environment
In this article, I will use Manjaro, but it must work in most popular Linux distros, it may also work in macOS and Windows, but you’ll maybe need to do some extra steps.
Prerequisites
You’ll need to have neovim at least version 0.8, and Lua language, and you maybe will want a terminal and fonts with ligatures support to get icons like in the image below, today I use kitty and JetBrains Mono, but you can choose anything you want.
First steps
All of our configs will be inside the home/.config/neovim directory by default, this is the directory that Neovim looks into to get the configs in Linux, so if you don’t have this directory you will need to create it. Doing so, we can start by creating the init.lua file inside the neovim directory.
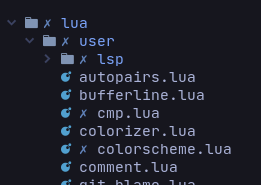
For organization purposes, I like to import other files inside my init.lua file, but this is a personal preference.
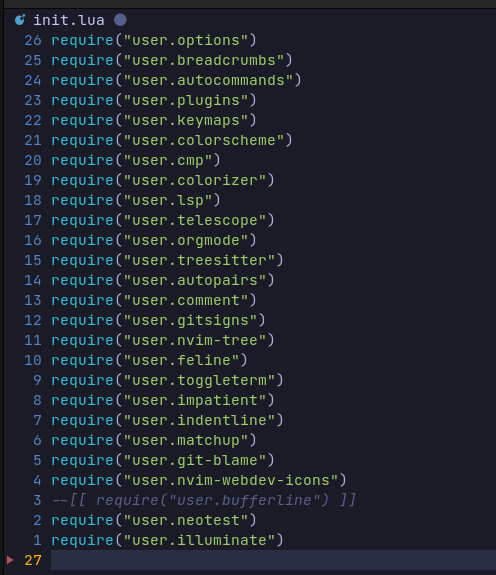
Just like in the image above, in Lua, we use require("yourfile") to import a module. The language will look into a lua folder in the same directory.
Options
One of the most important steps to config your neovim is to set your favorite editor options, neovim is a highly configurable editor and has tons of options for you to choose, here I will show a few that I like to have in my own configs, but if you want a complete list of the neovim options, you can consult it here.
Let’s create an options file in the neovim/lua/user/options.lua and import in the init.lua file with require("user.options") (Obs: we don’t need to put .lua extension in our imports).
-- ~/.config/neovim/lua/user/options.lua

-- convert tabs to spaces
vim.opt.expandtab = true

-- automatic indentation
vim.opt.smartindent = true

-- the number of spaces inserted for each indentation
vim.opt.shiftwidth = 2

-- allow neovim to access the system clipboard
vim.opt.clipboard = "unnamedplus"

-- highlight all matches on previous search pattern
vim.opt.hlsearch = true

-- ignore case in search patterns
vim.opt.ignorecase = true

-- allow the mouse to be used in neovim
vim.opt.mouse = "a"

-- insert 2 spaces for a tab
vim.opt.tabstop = 2

-- highlight the current line
vim.opt.cursorline = true

-- set numbered lines
vim.opt.number = true

-- faster completion (4000ms default)
vim.opt.updatetime = 250

-- the encoding written to a file
vim.opt.fileencoding = "utf-8"
Keymaps
A keymap is a combination of keys to trigger a specific action, like using ctrl + s to save the file as in the example below. In Neovim, keymaps have a central role because you do everything from your keyboard.
vim.api.nvim_set_keymap("n", "<C-s>", ":w", { nnoremap = true })
In this section, we will create some basic keymaps that I think are useful to improve your experience, you might need to return to your keymaps file once you download a new plugin because most parts of plugins add new behavior that will be good to have a keymap set on them.
Let’s create a keymaps file in the user folder, neovim/lua/user/keymaps.lua and import it in the init.lua with require("user.keymaps").
-- ~/.config/neovim/lua/user/keymaps.lua

local opts = { noremap = true, silent = true }
local keymap = vim.api.nvim_set_keymap

-- Save with ctrl + s
keymap("n", "<C-s>", ":w<CR>", { noremap = true })

-- In visual mode move text with J and K
keymap("x", "J", ":move '>+1gv-gv", opts)
keymap("x", "K", ":move '<-2gv-gv", opts)

-- Copy relative path with F4, usually I use this in tests
keymap("n", "<F4>", ':let @+ = fnamemodify(expand("%"), ":~:.")<CR>', opts)

-- Improve navigations in neovim windows with ctrl + neovim navigation keys
keymap("n", "<C-h>", "<C-w>h", opts)
keymap("n", "<C-j>", "<C-w>j", opts)
keymap("n", "<C-k>", "<C-w>k", opts)
keymap("n", "<C-l>", "<C-w>l", opts)

-- In insert mode go to normal mode with jk
keymap("i", "jk", "<ESC>", opts)
Plugins
Just like extensions in VSCode, plugins are external code that attaches to your editor and adds new features. Neovim is greatly extensible and has a lot of plugins to use. In this section, I will show how to install the plugins in Neovim with Lua and also a recommendation list of what I think is nice to have plugins.
First off, we will need a plugin to manage the others: Packer is a plugin manager that helps us to install, sync and remove other plugins. In order to install Packer you’ll need to open a terminal and type:
# Linux, Unix

git clone --depth 1 https://github.com/wbthomason/packer.nvim
   ~/.local/share/nvim/site/pack/packer/start/packer.nvim
Then, to configure it, we will need to create a file plugins.lua file under neovim/user/ and import it inside init.lua with require("user.plugins") just like we did before with other modules. Following the official docs in plugins.lua we will need to call packer with:
    return require('packer').startup(function(use)
      -- Packer can manage itself
      use 'wbthomason/packer.nvim'
    end)
Here we’re calling Packer to start the previous code we’ve downloaded and passing a callback with use as an argument, which we can call as a function and download any other plugins we want by just passing the end of the URL in GitHub with the use like in this example with Packer himself.

To check if everything is working properly you can type :P, if it’s working you’ll get some suggestions like this:

Remember to restart neovim after installing Packer to get the changes.
Recommendations
One of the places that inspired me to do this article was this series of videos from chris@machine, the founder of LunarVim.
To recommend the plugins I will split this section into three topics: essential, nice to have, and style plugins.
Essential Plugins
nvim-lua/plenary.nvim: it’s a base plugin for others, basically expanding the programming possibilities with neovim and because of this, it’s used by many others.
neovim/nvim-lspconfig: the plugin to activate native LSP from neovim, making things like diagnostics and definitions possible.
nvim-treesitter/nvim-treesitter: treesitter builds and updates a syntax tree for your code as you edit. It is also used in many other plugins.
hrsh7th/nvim-cmp: It is an extensible plugin that gets suggestions based on different things. You can combine it with the LSP to improve those suggestions at the same time.
jose-elias-alvarez/null-ls.nvim: add some linters and formatters not covered by native LSP to neovim, like javascript prettier and eslint, or ruby rubocop.
nvim-telescope/telescope.nvim: telescope is an extensible searcher for Neovim, mostly used to search for files and words, but it’s possible to extend it to look for things like git branches, git logs, colors, recent files, LSP references, etc.

Nice-to-have
nvim-tree/nvim-tree.lua: A file explorer for neovim. I think it’s more intuitive and also looks more like VSCode style.
lewis6991/gitsigns.nvim: basic git integration for neovim, I normally use to see some (as the name says) git signs from my git projects but it can do a lot more such as: show git diff, git blame, and just read the docs.
akinsho/bufferline.nvim and moll/vim-bbye: The user experience is better when both plugins are together, so if you came from another editor and miss some tab functionality, this is for you! Bufferline creates tabs in your editor just like any modern IDE.
williamboman/mason.nvim: it’s a manager for LSP, linters, and formatters, it shows you what is available, and you can install, remove or update any of them.

nvim-autopairs: a powerful autopair plugin that supports multiple characters.
Style Plugins
folke/tokyonight.nvim: the colorscheme where all of the screenshots were taken.
feline-nvim/feline.nvim: a customizable Lua status line plugin.

RRethy/vim-illuminate: highlights repeting words in the current buffer by LSP, tree-sitter, or regex matching. It’s a manager for LSP, linters, and formatters.
We want to work with you. Check out our Services page!
 Marcio Flavio


